

Connecting your Google calendar is simple. Once connected, Clientping will watch your calendar for upcoming appointments, send text message reminders, and allow your clients to confirm. Eliminate no-shows and take charge of your schedule!
Register for a Clientping account here. You'll be prompted to enter a credit card and choose a subscription. You will not be billed, however, unless you decide to keep your account. You'll have seven days to try out Clientping, and there is a great big cancel button if you decide not to proceed. No calls necessary.
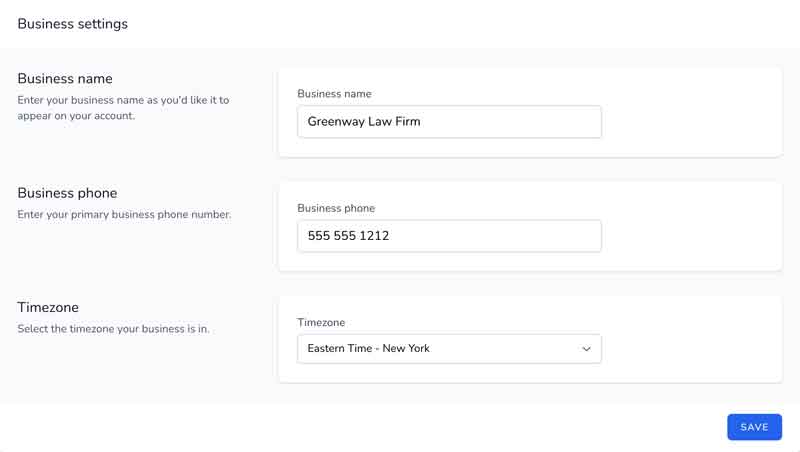
Clientping will prompt you to enter your business name, main phone number, and timezone.
Next, Clientping will ask you to choose a phone number. This is the phone number your text messages will come from. This number will be yours and yours alone. Select the number you'd like, and click "select."

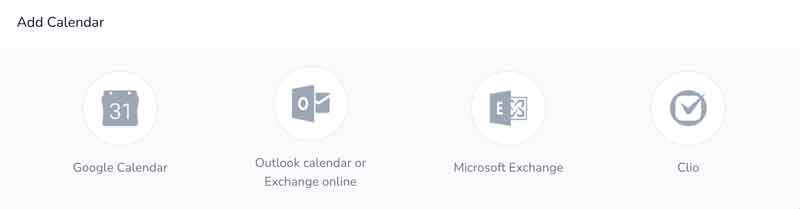
You'll be presented with "add calendar" screen, simply click the Google calendar button to proceed.
You will be redirected to the Google website, where you will be prompted to login. If you were already logged in, you instead may be sent to the next step.
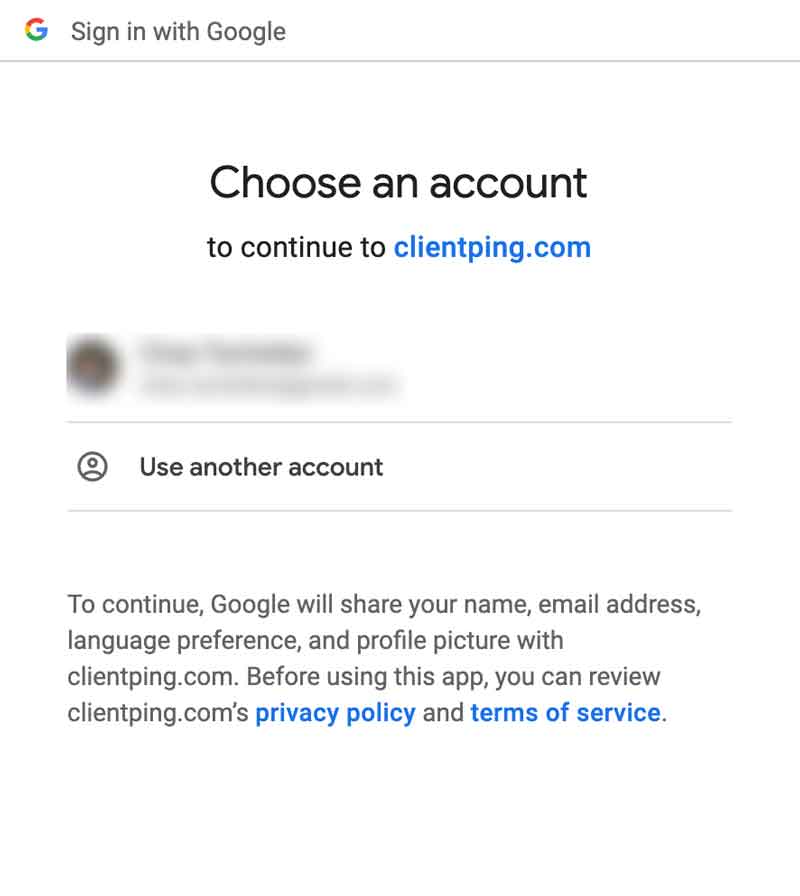
After logging in to Google, you will be presented with Google's standard screen for allowing access for Clientping. Choose 'Allow access'. Clientping does not in any way share or access your data for ANY reason. You can see our statement on privacy here.
You'll be show a list of the calendars you have set up in Google. Click the calendar you want to connect to Clientping.

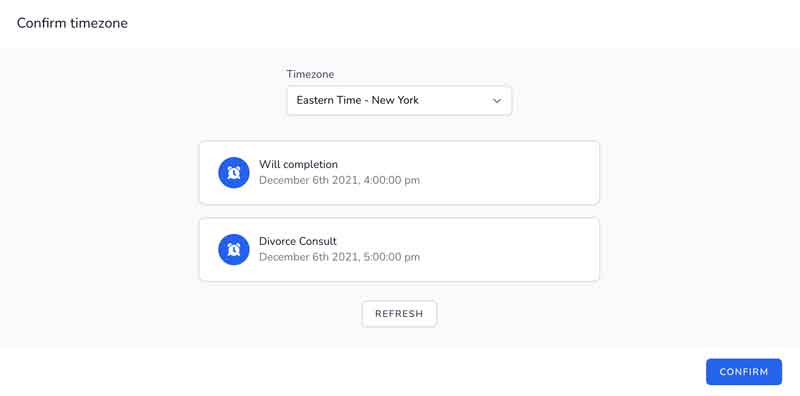
Clientping will show you a list of upcoming appointments over the next five days from the calendar you chose above. Make sure the time of the appointments is correct. If it is incorrect, choose the correct timezone. This setting is critical, as it determines what times will be displayed for your clients in reminder messages. If you don't have any upcoming appointments, add one to your calendar and click "refresh." Once you've confirmed the times are correct, click "confirm."
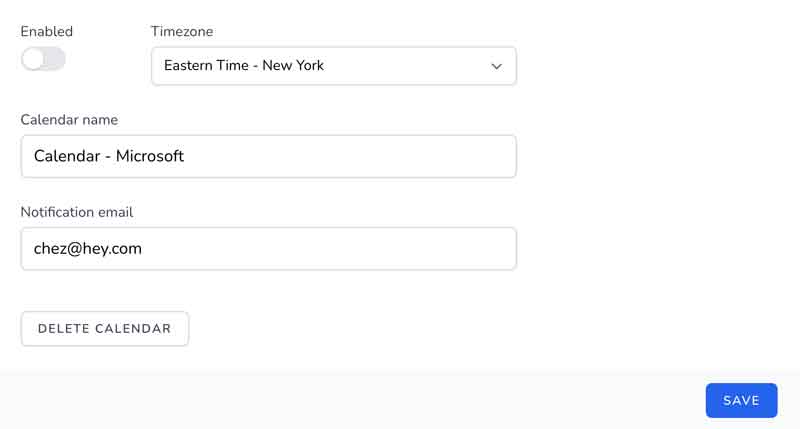
You'll now be shown your calendar settings. To turn on reminders, click the "enable" toggle to activate monitoring. By default, Clientping will remind your clients a day before the appointment, allow them to confirm by texting back "YES", or decline by texting back "NO". When a client declines, you'll receive an email at your notification email address with the contact details of the client and appointment so you can reschedule etc. If you'd like to change the time when reminders are sent, or change the text messages your clients receive, you can do so by clicking the "messages" menu item and the top center of the screen.
Congratulations! You have now connected your Google calendar! Clientping will take it from here!